前言:
原谅我直接跳过react的基础,直接就讲react+dva的实际应用,因为直接从项目结构来讲,我觉得学习的成本更低,开发的速度更快,当然有时间的话还是建议冲react的基础学起。

react的参考资料:
建议先从React 入门实例教程开始学
react的全家桶系列也不错
dva的参考资料:
dva的官方指南有很多不错的脚手架
ant design组合ant design UI可以说非常方便
例子
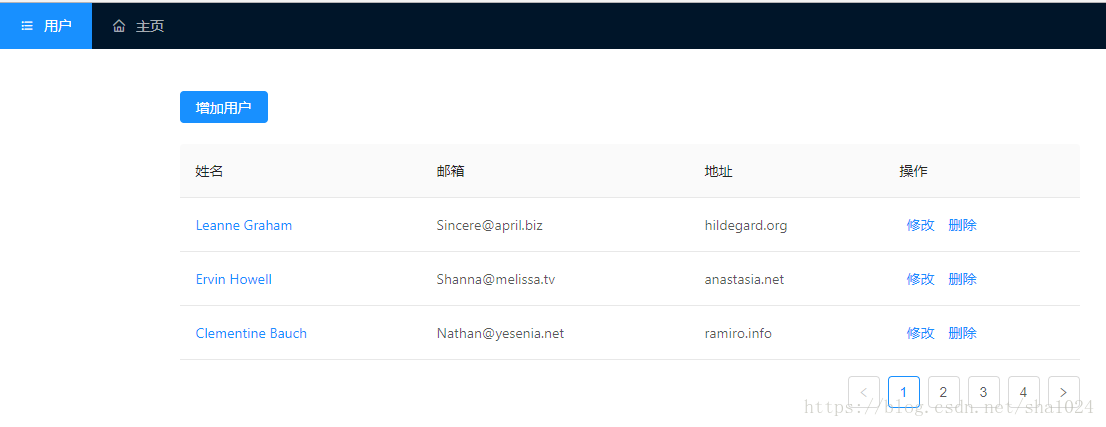
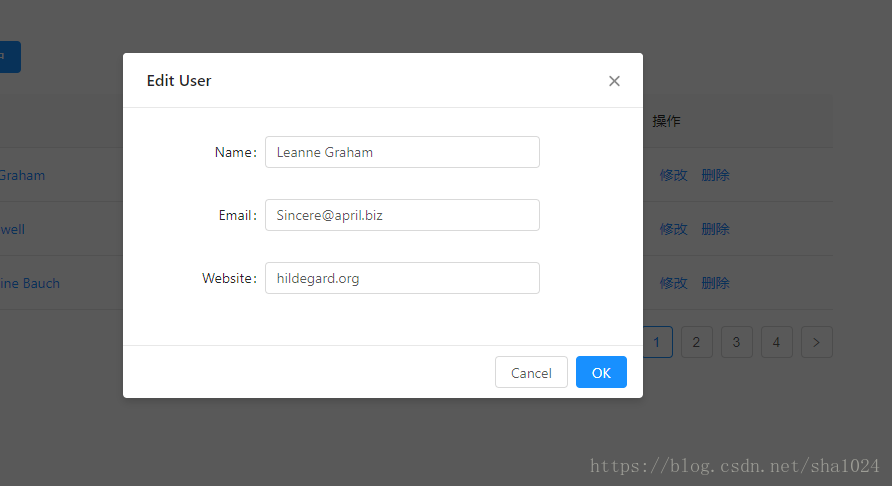
实现效果


前提条件
- 确保 node 版本是 6.5 +
- 用 cnpm 或 yarn 能节约你安装依赖的时间
第一步:
打开cmd,切换到你要安装的目录,使用npm安装dva-cli
1
2
3
| $ npm i dva-cli@0.7 -g
$ dva -v
0.7.0
|
然后可以在命令行输入命令创建应用
1
2
| $ dva new user-dashboard
$ cd user-dashboard
|
第二步,
配置 antd 和 babel-plugin-import
babel-plugin-import 主要是用于按需引入 antd 的 JavaScript 和 CSS,这样打包出来的文件不至于太大。详情请看dva
1
2
| $ npm i antd
$ npm i babel-plugin-import
|
如果dva的版本是在0.7一下的话是没有.roadhogrc文件,修改 .roadhogrc,在 “extraBabelPlugins” 里加上,0.7一下的话是修改.webpackrc文件:
1
| ["import", { "libraryName": "antd", "style": "css" }]
|
第三步,
配置代理,能通过 RESTFul 的方式访问
修改 .roadhogrc,加上 “proxy” 配置,或者修改.webpackrc文件也可:
可以通过http://localhost:8000/api/users来查看json数据
1
2
3
4
5
6
7
| "proxy": {
"/api": {
"target": "http://jsonplaceholder.typicode.com/",
"changeOrigin": true,
"pathRewrite": { "^/api" : "" }
}
},
|
然后启动应用:可以新开一个命令行窗口
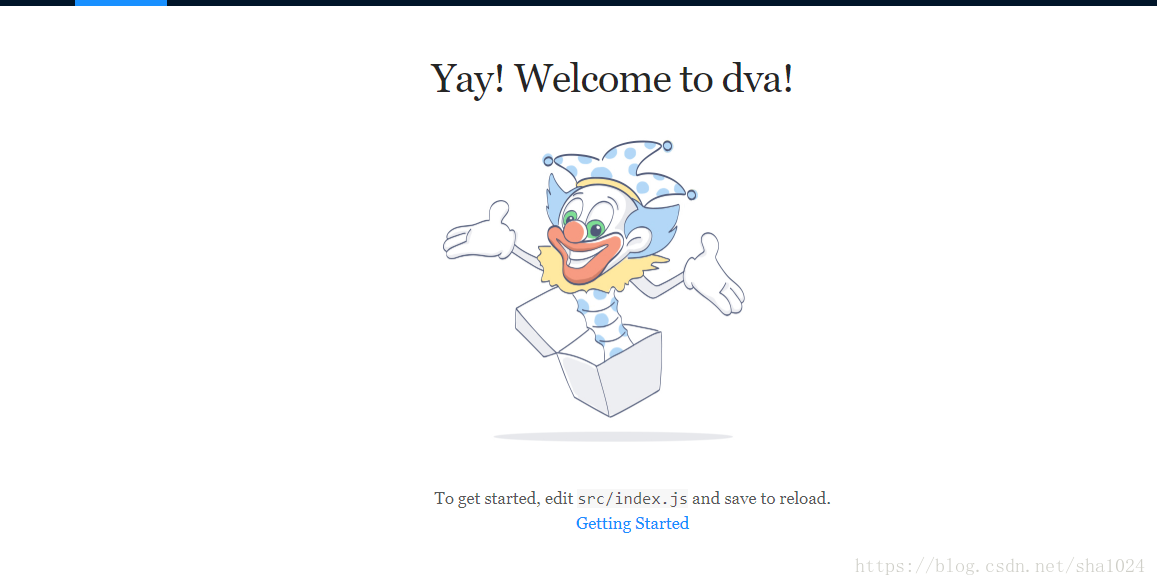
然后系统就会自动在浏览器中打开页面,也可以访问http://localhost:8000/

第四步,
生成 users 路由
输入这个命令就会在src的routes生成两个文件,一个User.js,一个是User.css,然后访问 http://localhost:8000/#/users 。
第五步,
构造 users model 和 service
同上,用dva的命令生成文件
然后修改 src/models/users.js :
1
2
3
4
5
6
7
8
9
10
11
12
13
14
15
16
17
18
19
20
21
22
23
24
25
26
27
28
29
| import * as usersService from '../services/users';
export default {
namespace: 'users',
state: {
list: [],
total: null,
},
reducers: {
save(state, { payload: { data: list, total } }) {
return { ...state, list, total };
},
},
effects: {
*fetch({ payload: { page } }, { call, put }) {
const { data, headers } = yield call(usersService.fetch, { page });
yield put({ type: 'save', payload: { data, total: headers['x-total-count'] } });
},
},
subscriptions: {
setup({ dispatch, history }) {
return history.listen(({ pathname, query }) => {
if (pathname === '/users') {
dispatch({ type: 'fetch', payload: query });
}
});
},
},
};
|
在目标文件夹中新增 src/services/users.js:
1
2
3
4
5
| import request from '../utils/request';
export function fetch({ page = 1 }) {
return request(`/api/users?_page=${page}&_limit=5`);
}
|
由于我们需要从 response headers 中获取 total users 数量,所以需要改造下 src/utils/request.js:
1
2
3
4
5
6
7
8
9
10
11
12
13
14
15
16
17
18
19
20
21
22
23
24
25
26
27
28
29
30
31
32
33
34
35
36
37
| import fetch from
function checkStatus(response) {
if (response.status >= 200 && response.status < 300) {
return response;
}
const error = new Error(response.statusText);
error.response = response;
throw error;
}
/**
* Requests a URL, returning a promise.
*
* @param {string} url The URL we want to request
* @param {object} [options] The options we want to pass to "fetch"
* @return {object} An object containing either "data" or "err"
*/
export default async function request(url, options) {
const response = await fetch(url, options);
checkStatus(response);
const data = await response.json();
const ret = {
data,
headers: {},
};
if (response.headers.get(
ret.headers[
}
return ret;
}
|
第六步,
添加界面,让用户列表展现出来
用 dva-cli 生成 component:
1
| $ dva g component Users/Users
|
然后修改生成出来的 src/components/Users/Users.js 和 src/components/Users/Users.css,并在 src/routes/Users.js 中引用他。
User.js
1
2
3
4
5
6
7
8
9
10
11
12
13
14
15
16
17
18
19
20
21
22
23
24
25
26
27
28
29
30
31
32
33
34
35
36
37
38
39
40
41
42
43
44
45
46
47
48
49
50
51
52
53
54
55
56
57
58
59
60
61
62
63
64
65
66
67
68
69
70
71
72
73
74
75
76
77
78
79
80
81
82
83
84
85
86
87
88
89
90
91
92
93
94
95
96
97
98
99
100
101
102
103
104
105
106
107
108
109
| import React from 'react';
import { connect } from 'dva';
import { Table, Pagination, Popconfirm, Button } from 'antd';
import { routerRedux } from 'dva/router';
import styles from './Users.css';
import { PAGE_SIZE } from '../../constants';
import UserModal from './UserModal';
function Users({ dispatch, list: dataSource, loading, total, page: current }) {
function deleteHandler(id) {
dispatch({
type: 'users/remove',
payload: id,
});
}
function editHandler(id, values) {
dispatch({
type: 'users/patch',
payload: { id, values },
});
}
function pageChangeHandler(page) {
dispatch(routerRedux.push({
pathname: '/users',
query: { page },
}));
}
function createHandler(values) {
dispatch({
type: 'users/create',
payload: values,
});
}
const columns = [
{
title: '姓名',
dataIndex: 'name',
key: 'name',
render: text => <a href="">{text}</a>,
},
{
title: '邮箱',
dataIndex: 'email',
key: 'email',
},
{
title: '地址',
dataIndex: 'website',
key: 'website',
},
{
title: '操作',
key: 'operation',
render: (text, record) => (
<span className={styles.operation}>
<UserModal record={record} onOk={editHandler.bind(null, record.id)}>
<a>修改</a>
</UserModal>
<Popconfirm title="Confirm to delete?" onConfirm={deleteHandler.bind(null, record.id)}>
<a href="">删除</a>
</Popconfirm>
</span>
),
},
];
return (
<div className={styles.normal}>
<div>
<div className={styles.create}>
<UserModal record={{}} onOk={createHandler}>
<Button type="primary">增加用户</Button>
</UserModal>
</div>
<Table
columns={columns}
dataSource={dataSource}
loading={loading}
rowKey={record => record.id}
pagination={false}
/>
<Pagination
className="ant-table-pagination"
total={total}
current={current}
pageSize={PAGE_SIZE}
onChange={pageChangeHandler}
/>
</div>
</div>
);
}
function mapStateToProps(state) {
const { list, total, page } = state.users;
return {
loading: state.loading.models.users,
list,
total,
page,
};
}
export default connect(mapStateToProps)(Users);
|
User.css
1
2
3
4
5
6
7
8
9
| .normal {
}
.create {
margin-bottom: 1.5em;
}
.operation a {
margin: 0 .5em;
}
|
这边主要是对 model 进行了微调,加入了 page 表示当前页
由于 components 和 services 中都用到了 pageSize,所以提取到 src/constants.js
改完后,切换到浏览器,应该能看到带分页的用户列表
第七步,
添加 layout
- 添加 layout 布局,使得我们可以在首页和用户列表页之间来回切换。
2.添加布局,src/components/MainLayout/MainLayout.js 和 CSS 文件
在 src/routes 文件夹下的文件中引用这个布局
1
2
3
4
5
6
7
8
9
10
11
12
13
14
15
16
| import React from 'react';
import { Router, Route } from 'dva/router';
import IndexPage from './routes/IndexPage';
import Users from "./routes/Users.js";
function RouterConfig({ history }) {
return (
<Router history={history}>
<Route path="/" component={IndexPage} />
<Route path="/users" component={Users} />
</Router>
);
}
export default RouterConfig;
|
第八步,
通过 dva-loading 处理 loading 状态
dva 有一个管理 effects 执行的 hook,并基于此封装了 dva-loading 插件。通过这个插件,我们可以不必一遍遍地写 showLoading 和 hideLoading,当发起请求时,插件会自动设置数据里的 loading 状态为 true 或 false 。然后我们在渲染 components 时绑定并根据这个数据进行渲染。
先安装 dva-loading :
1
| npm i dva-loading --save
|
修改 src/index.js 加载插件,在对应的地方加入下面两句:
1
2
| import createLoading from 'dva-loading';
app.use(createLoading());
|
然后在 src/components/Users/Users.js 里绑定 loading 数据:
1
| loading: state.loading.models.users,
|
具体参考这个 例子。
第九步,
处理分页
只改一个文件 src/components/Users/Users.js 就好。
处理分页有两个思路:
- 发 action,请求新的分页数据,保存到 model,然后自动更新页面
- 切换路由 (由于之前监听了路由变化,所以后续的事情会自动处理)
我们用的是思路 2 的方式,好处是用户可以直接访问到 page 2 或其他页面。
参考这个 例子。
第10步,
用户的修改,删除,增加都是对三个文件的操作
- service, 修改 src/services/users.js:
1
2
3
4
5
6
7
8
9
10
11
12
13
14
15
16
17
18
19
20
21
22
23
24
25
26
27
28
29
30
| import request from '../utils/request';
import { PAGE_SIZE } from '../constants';
export function fetch({ page }) {
return request(`/api/users?_page=${page}&_limit=${PAGE_SIZE}`);
}
export function remove(id) {
return request(`/api/users/${id}`, {
method: 'DELETE',
});
}
export function patch(id, values) {
return request(`/api/users/${id}`, {
method: 'PATCH',
body: JSON.stringify(values),
headers: {
'Content-Type': 'application/json',
'Accept': 'application/json',
},
});
}
export function create(values) {
return request('/api/users', {
method: 'POST',
body: JSON.stringify(values),
});
}
|
- model, 修改 src/models/users.js:
1
2
3
4
5
6
7
8
9
10
11
12
13
14
15
16
17
18
19
20
21
22
23
24
25
26
27
28
29
30
31
32
33
34
35
36
37
38
39
40
41
42
43
44
45
46
47
48
49
50
51
52
53
54
55
56
57
58
| import * as usersService from '../services/users';
export default {
namespace: 'users',
state: {
list: [],
total: null,
page: null,
},
reducers: {
save(state, { payload: { data: list, total, page } }) {
return { ...state, list, total, page };
},
},
effects: {
//分页
*fetch({ payload: { page = 1 } }, { call, put }) {
const { data, headers } = yield call(usersService.fetch, { page });
yield put({
type: 'save',
payload: {
data,
total: parseInt(headers['x-total-count'], 10),
page: parseInt(page, 10),
},
});
},
//删除
*remove({ payload: id }, { call, put }) {
yield call(usersService.remove, id);
yield put({ type: 'reload' });
},
//修改
*patch({ payload: { id, values } }, { call, put }) {
yield call(usersService.patch, id, values);
yield put({ type: 'reload' });
},
//新增
*create({ payload: values }, { call, put }) {
yield call(usersService.create, values);
yield put({ type: 'reload' });
},
*reload(action, { put, select }) {
const page = yield select(state => state.users.page);
yield put({ type: 'fetch', payload: { page } });
},
},
subscriptions: {
setup({ dispatch, history }) {
return history.listen(({ pathname, query }) => {
if (pathname === '/users') {
dispatch({ type: 'fetch', payload: query });
}
});
},
},
};
|
- component, 修改 src/components/Users/Users.js,替换 deleteHandler 内容:
1
2
3
4
5
6
7
8
9
10
11
12
13
14
15
16
17
18
19
20
21
22
23
24
25
26
27
28
29
30
31
32
33
34
35
36
37
38
39
40
41
42
43
44
45
46
47
48
49
50
51
52
53
54
55
56
57
58
59
60
61
62
63
64
65
66
67
68
69
70
71
72
73
74
75
76
77
78
79
80
81
82
83
84
85
86
87
88
89
90
91
92
93
94
95
96
97
98
99
100
101
102
103
104
105
106
107
108
109
| import React from 'react';
import { connect } from 'dva';
import { Table, Pagination, Popconfirm, Button } from 'antd';
import { routerRedux } from 'dva/router';
import styles from './Users.css';
import { PAGE_SIZE } from '../../constants';
import UserModal from './UserModal';
function Users({ dispatch, list: dataSource, loading, total, page: current }) {
//删除
function deleteHandler(id) {
dispatch({
type: 'users/remove',
payload: id,
});
}
//修改
function editHandler(id, values) {
dispatch({
type: 'users/patch',
payload: { id, values },
});
}
//分页
function pageChangeHandler(page) {
dispatch(routerRedux.push({
pathname: '/users',
query: { page },
}));
}
//新增
function createHandler(values) {
dispatch({
type: 'users/create',
payload: values,
});
}
const columns = [
{
title: '姓名',
dataIndex: 'name',
key: 'name',
render: text => <a href="">{text}</a>,
},
{
title: '邮箱',
dataIndex: 'email',
key: 'email',
},
{
title: '地址',
dataIndex: 'website',
key: 'website',
},
{
title: '操作',
key: 'operation',
render: (text, record) => (
<span className={styles.operation}>
<UserModal record={record} onOk={editHandler.bind(null, record.id)}>
<a>修改</a>
</UserModal>
<Popconfirm title="Confirm to delete?" onConfirm={deleteHandler.bind(null, record.id)}>
<a href="">删除</a>
</Popconfirm>
</span>
),
},
];
return (
<div className={styles.normal}>
<div>
<div className={styles.create}>
<UserModal record={{}} onOk={createHandler}>
<Button type="primary">增加用户</Button>
</UserModal>
</div>
<Table
columns={columns}
dataSource={dataSource}
loading={loading}
rowKey={record => record.id}
pagination={false}
/>
<Pagination
className="ant-table-pagination"
total={total}
current={current}
pageSize={PAGE_SIZE}
onChange={pageChangeHandler}
/>
</div>
</div>
);
}
function mapStateToProps(state) {
const { list, total, page } = state.users;
return {
loading: state.loading.models.users,
list,
total,
page,
};
}
export default connect(mapStateToProps)(Users);
|
以上就是react+dva+antd实现的一个简单的增删改的操作例子。


